Create your first map
Create a simple SVG map first. You can add a directory, markers, and Google Maps later.
Choose the SVG
Section titled “Choose the SVG”- Open MapSVG and choose New chat to reach the start screen.
- On the welcome screen, click Create new map manually.
- Select SVG map.
- Browse or search the MapSVG SVG catalog. For this guide, choose geo-calibrated/usa.svg.
- Enter USA Explorer as the map title and click Create map.
The editor opens the new App with its initial Page, component tree, and data bindings. Creation provisions the map’s Regions and Objects Collections and their default Queries.
Give it a consistent appearance
Section titled “Give it a consistent appearance”- Open the App panel in the right toolbar.
- Select Region under Map in the tree.
- Open Styles using the paintbrush icon.
- Set Regions to
#1274b7and Borders to#ffffff. - Choose a lighter hover/selected appearance so visitors can recognize an interactive region.
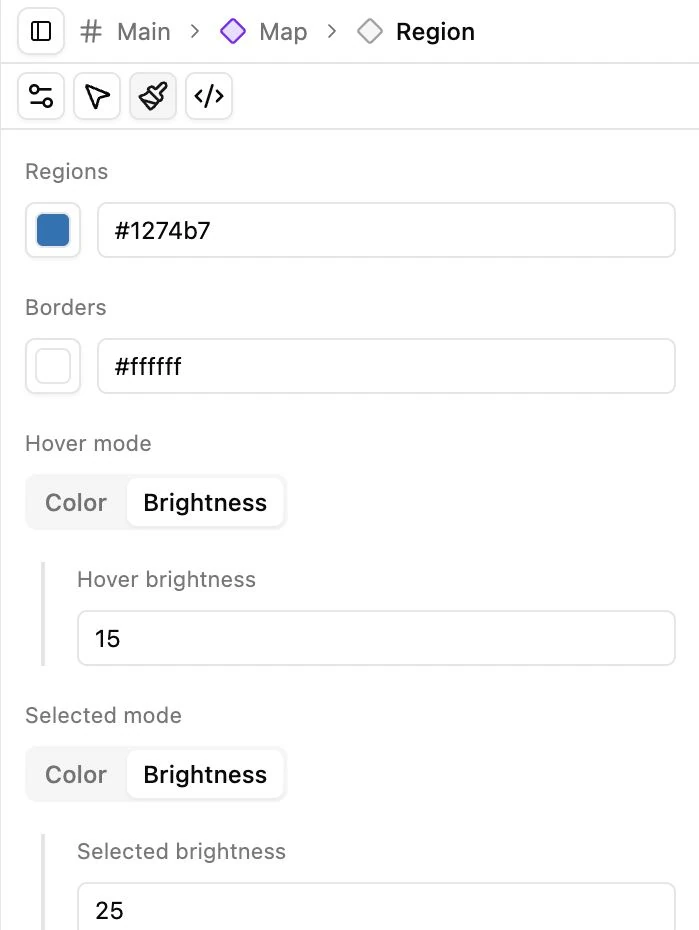
If a data rule supplies a region’s color, it takes priority over the base fill. Use Data rules when coloring regions by status or another field.
Test and publish
Section titled “Test and publish”Select Arrow below the preview and click a region. Hand mode moves the editor canvas and deliberately intercepts map clicks.
Changes are automatically saved to the current draft. Click Publish, review the confirmation, and then insert the map’s shortcode in a WordPress Shortcode block. See Embedding for the exact process.
Expected result: a blue USA map with white state borders appears on the published WordPress page. The SVG’s geographic calibration is retained for a later Google overlay; choosing a calibrated file alone does not enable Google Maps.