Edit the SVG drawing
Use the SVG editor when you need to change shapes, region IDs, titles, or the drawing itself. Use Layout for component placement and Database for record values.
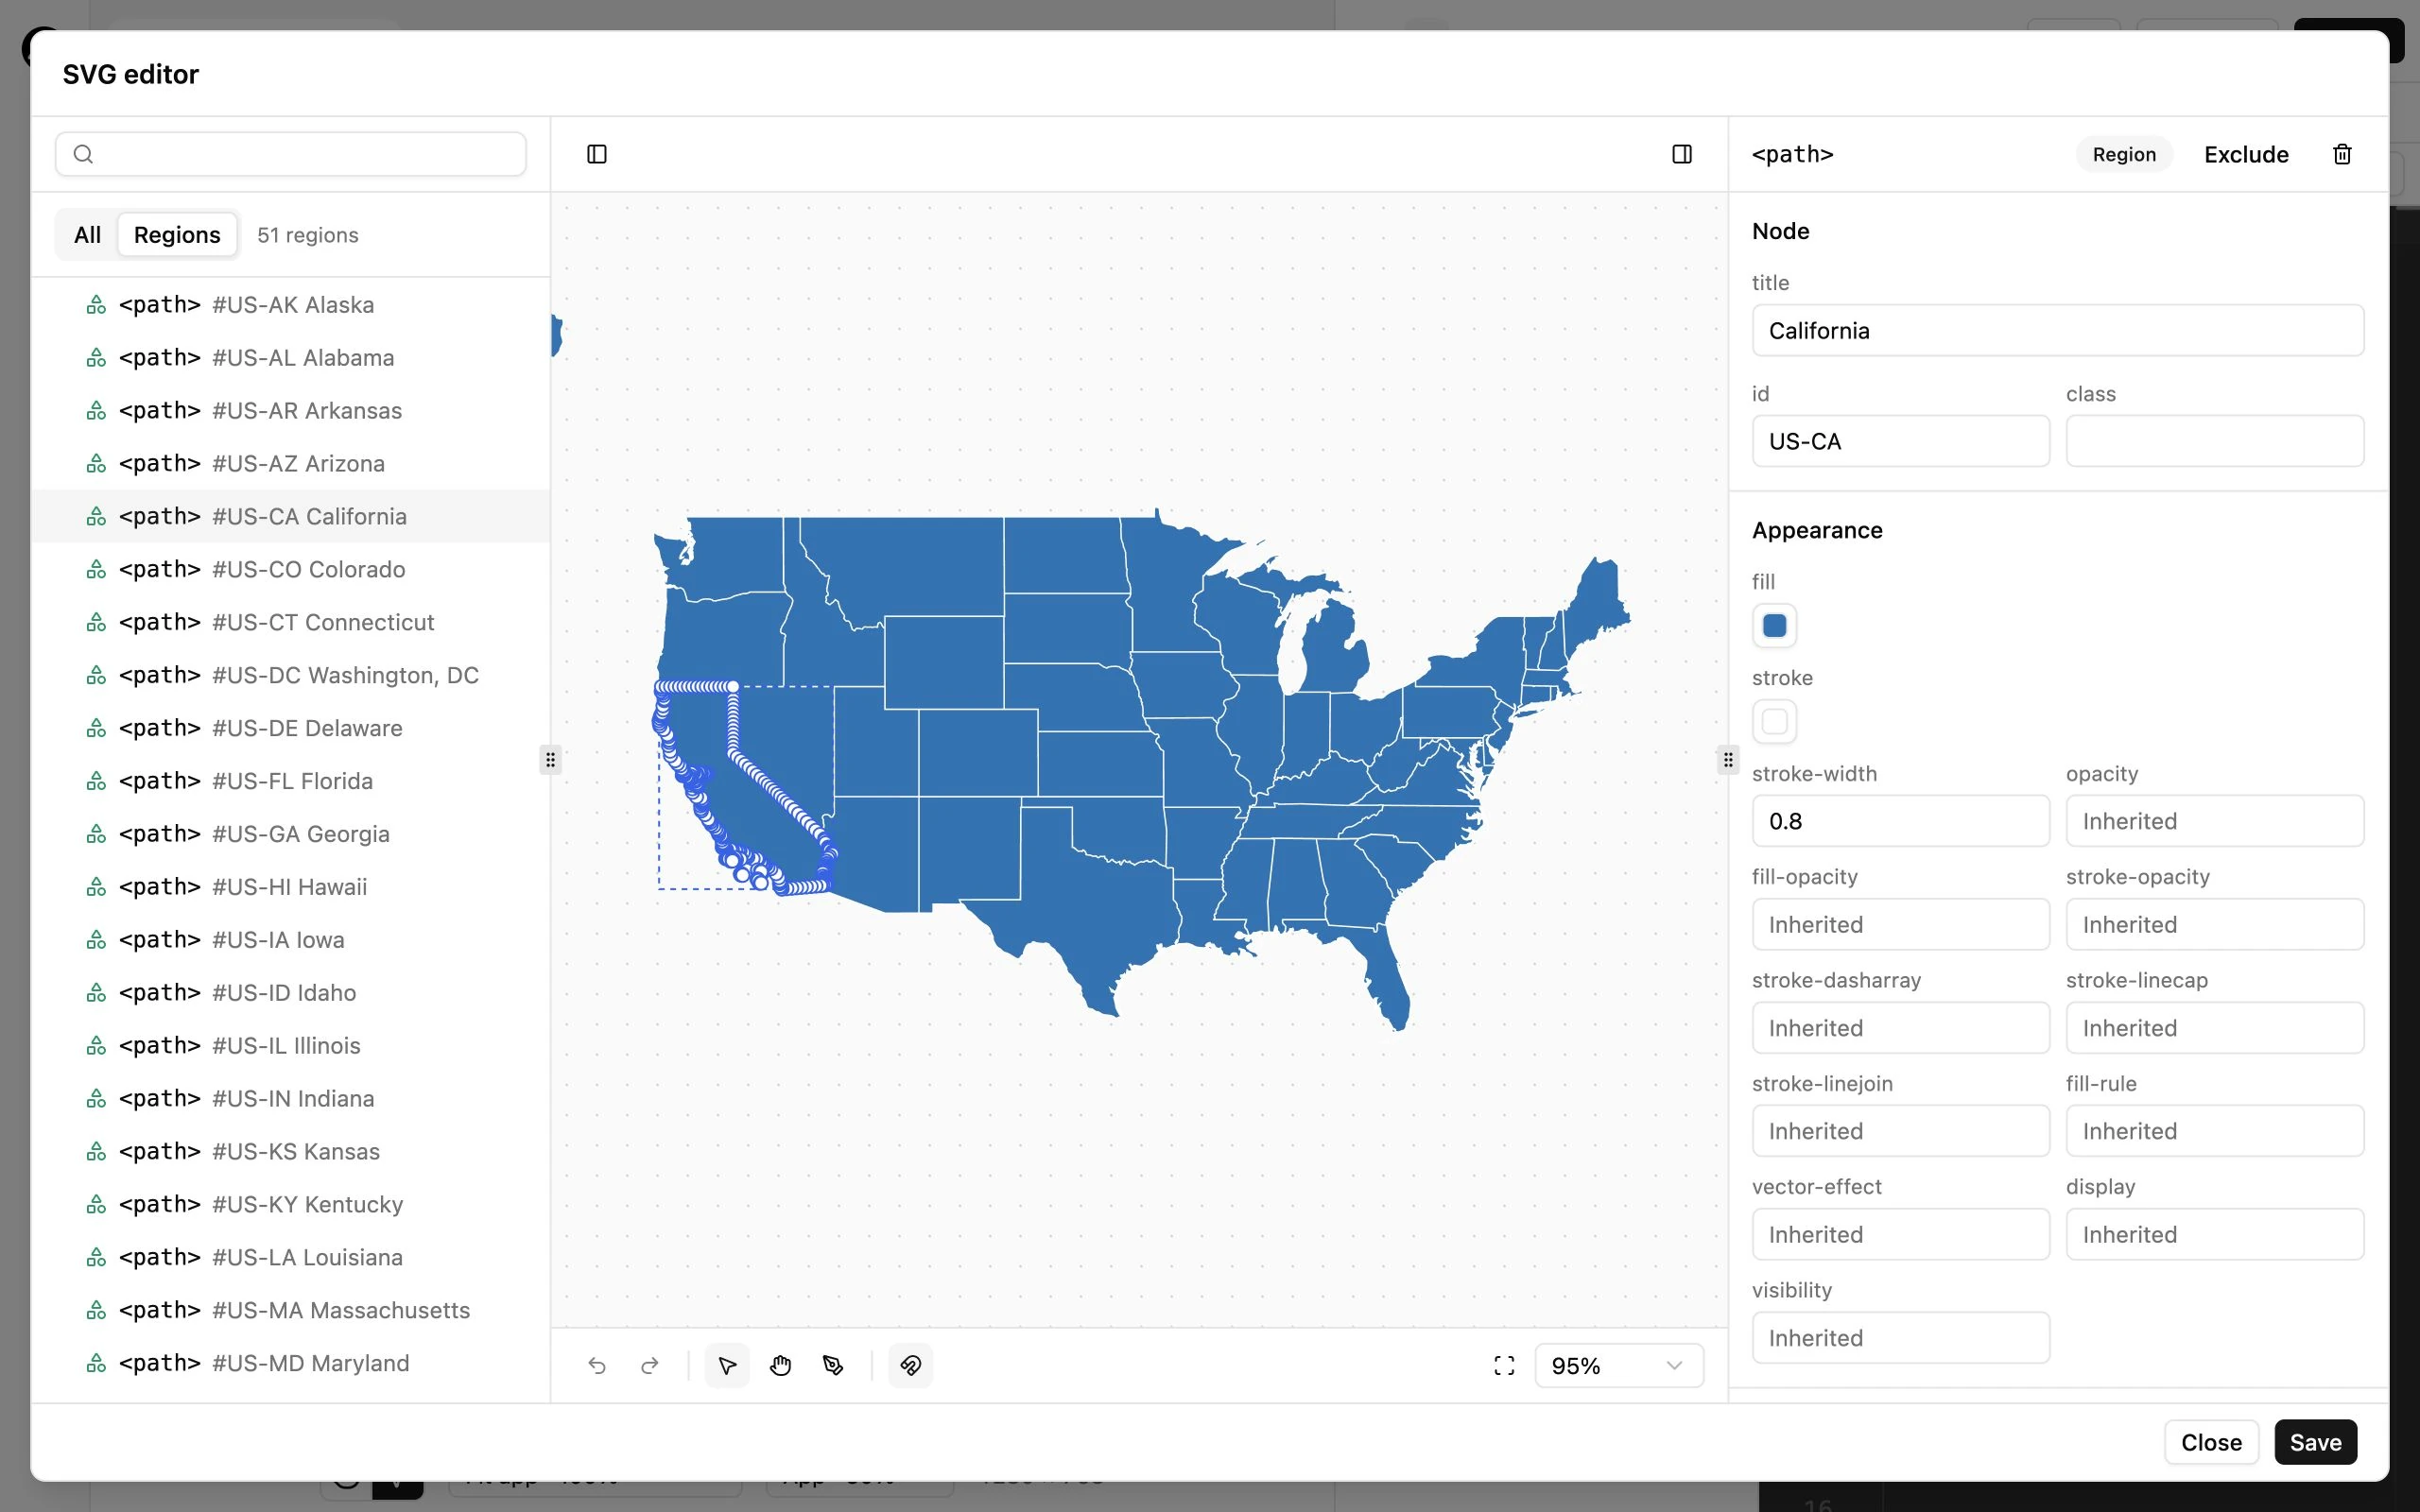
Open and select
Section titled “Open and select”- Open your App and click Draw above the preview, or use the SVG editing action in Map settings.
- Select a shape in the drawing or in the XML tree.
- Inspect its Node properties on the right.
The XML tree starts with Regions selected. All includes other nodes such as groups, text, images, and definitions. Search by ID or title to find a node in a large SVG.
A text or image node remains editable even though it is not a MapSVG region. Selecting it does not turn it into an interactive region.
Region membership
Section titled “Region membership”An eligible path, polygon, circle, ellipse, or rectangle can be a region when it has a suitable ID and is not explicitly excluded. Exclude keeps the drawing visible but removes it from MapSVG’s region list. Turn into region removes the exclusion and supplies a unique ID and fill when required.
IDs connect SVG regions to database records. Changing one can break the association with an existing record. Edit titles when you only want a different display name.
Geometry and attributes
Section titled “Geometry and attributes”Use Select to edit points, Draw region to draw a region, and Hand to pan, with Snapping, Undo, and Redo as needed. Geometry, Transform, and XML attributes are collapsible inspector sections. Keep them closed during ordinary title/ID edits; open them for precise adjustments.
The XML tree and drawing are two views of the same document. Unsupported SVG content can remain in the file without becoming a region.
Save safely
Section titled “Save safely”Click Save to apply the SVG to the current draft. Saving a draft’s SVG uses the editor’s managed file/revision flow; it does not publish the draft. Close without saving to discard the drawing session. Review the normal preview and publish separately when ready.
Do not edit a shared uploaded SVG directly on disk while the editor is open. Use the editor’s save flow to preserve revision checks and published versions.