SVG maps
Click the New SVG map drop-down. You'll see a list of all available maps. Start typing the name of the country and choose an SVG file:
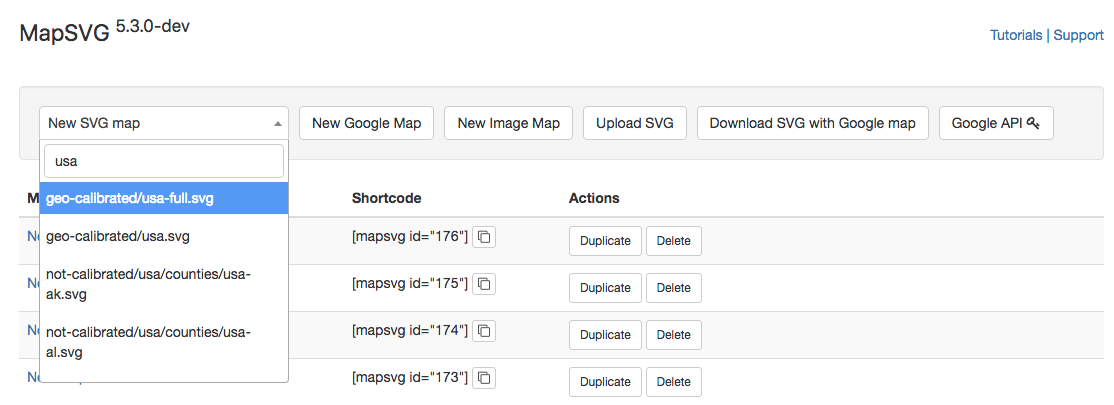
Each file in the list sits under one of these paths:
geo-calibrated/: calibrated maps. If the country you need is present in both geo-calibrated and uncalibrated versions, use the geo-calibrated version. You can add Markers with lat/lng coordinates (by entering an address) to geo-calibrated maps, and you can overlay them on a Google Map. You can't do that with uncalibrated maps.not-calibrated/: outdated maps from early MapSVG versions, kept mostly for backward compatibility. You can't add markers by address or lat/lng, and you can't overlay them on Google Map. Some maps can't be calibrated — for example, a USA map with a small Alaska and Hawaii below the main states.user-uploads/: your custom uploaded SVG files. Uploaded files appear here immediately. Uploading a new version with the same filename overwrites the previous one.
Using a custom SVG file
When you create a new map from an SVG file, MapSVG parses the file and finds SVG shapes that should be interactive. Those objects appear in the list of Regions in MapSVG.
SVG file requirements
SVG objects that match ALL of the following rules are added to the list of Regions:
- Type of the object is: path / rect / polygon / ellipse / circle
- Object has an ID. Example, SVG object without ID:
<path d="..." />
SVG object with ID:
<path id="area-51" d="..." />
If you're creating a custom SVG file in Adobe Illustrator: you can't set IDs for individual SVG objects there. AI converts layer names to IDs, but a layer may contain multiple SVG objects. The ID is given to a <g id="layer-name">...</g> SVG tag, and individual SVG objects inside it are left without IDs. It is recommended to use Inkscape (free SVG editing software) for SVG editing (at least for final SVG editing after AI). How to set an Object ID in Inkscape: open your SVG file, right-click on a vector shape, choose "Object properties", enter ID, click "Set". You can also set IDs directly in MapSVG by clicking the "Edit SVG file" button in the top toolbar.
- Object has a color fill. If you create a custom SVG file and need Regions that are transparent, don't use empty or
nonecolor fill values — usergba(0,0,0,0)as a transparent color. - If Region ID prefix is provided in MapSVG settings, the SVG Object ID must start with the prefix. In more detail: when you use a custom SVG file, sometimes there are too many small graphical details that have IDs — so they would appear in the list of Regions, and you don't want all of them there. In that case you can add a prefix to the IDs of SVG objects that you want to become Regions in MapSVG. Example: in MapSVG settings you set Region ID prefix = "lot*". Then the following objects are added to the list of Regions:
<path id="lot_number_12" d="..." /> <rect id="lot_number_3" x="..." y="..." />
These objects will be skipped:
<path id="path_231" d="..." /> <circle id="circle_89" x="..." y="..." />
Calibrating your SVG file
If you want to calibrate your SVG file, open it in any text editor and add the following lines to the root <svg> tag:
<svg
  xmlns:mapsvg="https://mapsvg.com"
  mapsvg:geoViewBox="1.409450 42.654907 1.786860 42.426982"
  ...
></svg>
Numbers in the mapsvg:geoViewBox attribute are lat/lng coordinates of the map borders in the following order: left-lng top-lat right-lng bottom-lat
Uploading the file and creating a new map
Click Upload SVG file on the MapSVG start screen and choose your file. Please note that uploading a large file may take a long time. When uploading finishes, you'll see a green message "File uploaded". Now you can click the New SVG file drop-down, enter your file name in the search box (or enter "user-uploads/" to see all uploaded files), and choose your file from the list to create a new map.