MapSVG 2.x tutorial
Creating a vector map with menu in WordPress
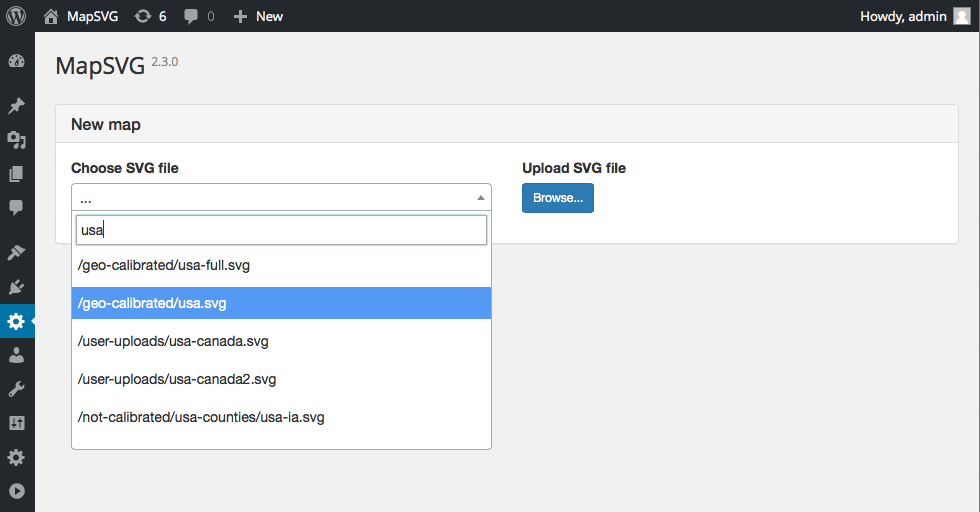
Sometimes you need a map with clickable list of Regions. One of examples could be a list of distributors accross the country which you would like to show as a clickable menu next to your map. Let's see how you can achieve that with the map of USA as an example. Go To WordPress Admin > MapSVG.

Let's say you have 3 distributors in 3 states: NY, FL and CA. You want only those 3 states to be clickable on the map and you don't want to show any other states in the menu.
So first go to Settings tab and set Disable all regions to On.
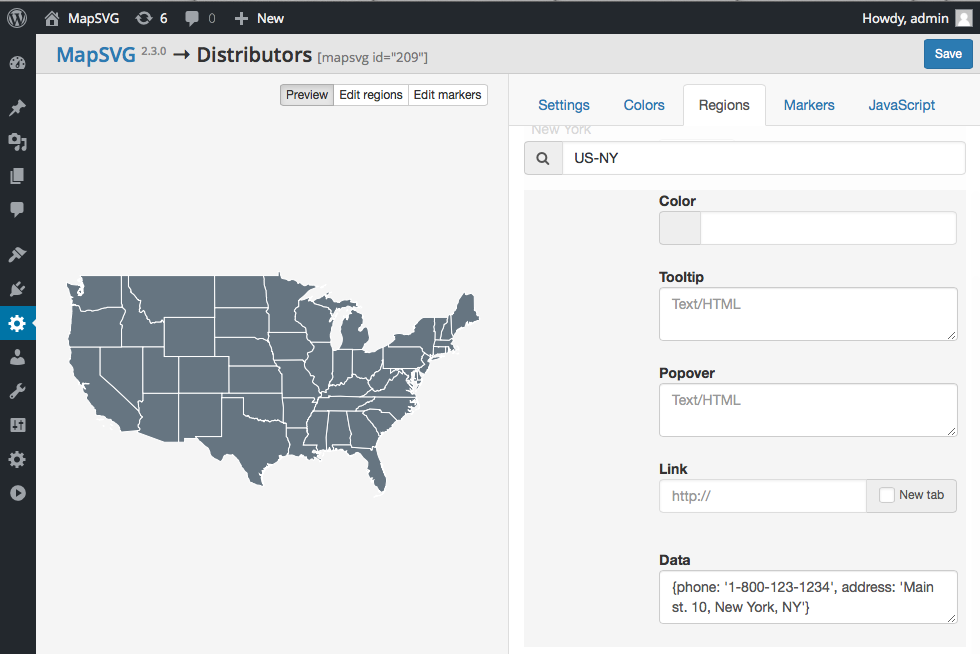
Now go to Regions tab. Click on the search box and enter "US-NY". Click on the state in search results to start editing it.
First click Disabled button to enable the state back. When you set
Disable all regions to On you should enable back every Region you need
to be active.
This time we'll use Data attribute to create cool popovers.
Data attribute is javaScript object which could be used to store any custom
data for a Region. Let's add address and phone number into it. Add this code into Data:
{phone: '1-800-123-1234', address: 'Main st. 10, New York, NY'}Repeat this step for FL and CA states.
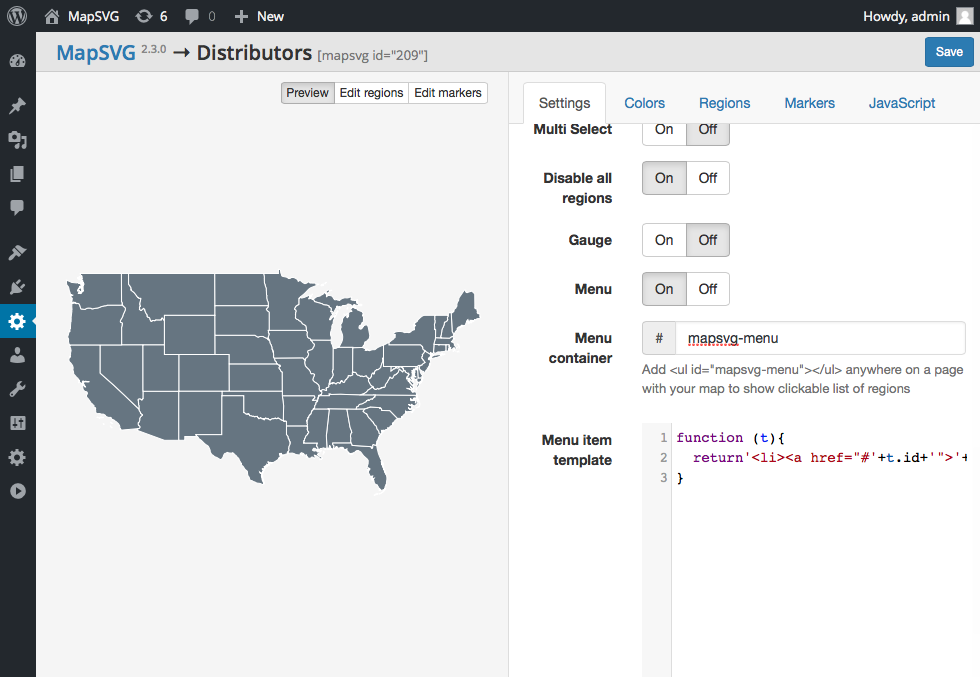
Now go to Settings tab and set Menu to on.
Enter "mapsvg-menu" into Menu container.
You can change Menu item template if you want to show not only state name but
some info
from Data attribute as well:
function (state){
    var template = '<li><a href="#'+t.id+'">';
    template += '<b>'+state.title+'</b><br />';
    template += 'phone: '+state.phone+'<br />';
    template += 'address: '+state.address+'</a></li>'
};
But let's don't touch Menu item template right now to make things more simple.
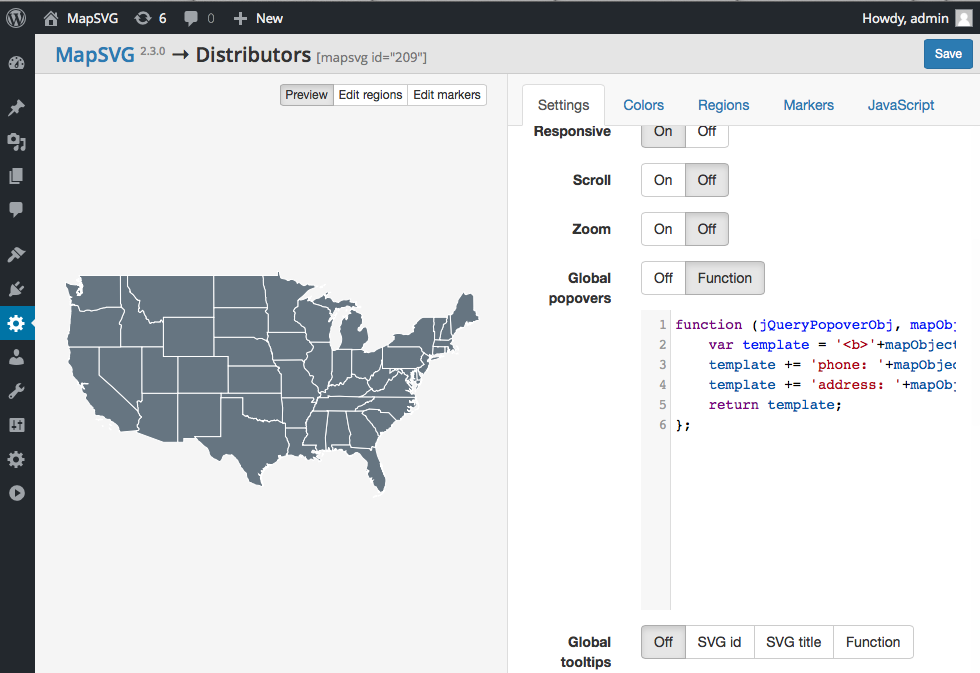
Now let's set popovers. Go to Settings tab and
set Global popovers to Function and put this code into input field:
function (jQueryPopoverObj, mapObject, mapsvgInstance){
    var template = '<b>'+mapObject.title+'</b><br />';
    template += 'phone: '+mapObject.data.phone+'<br />';
    template += 'address: '+mapObject.data.address;
    return template;
}
You can see that we use Data attribute which we defined earlier for each state.
Global popovers work for all active Regions -
short and simple. This way you don't need to repeat the same popover HTML code again and again for each Region.
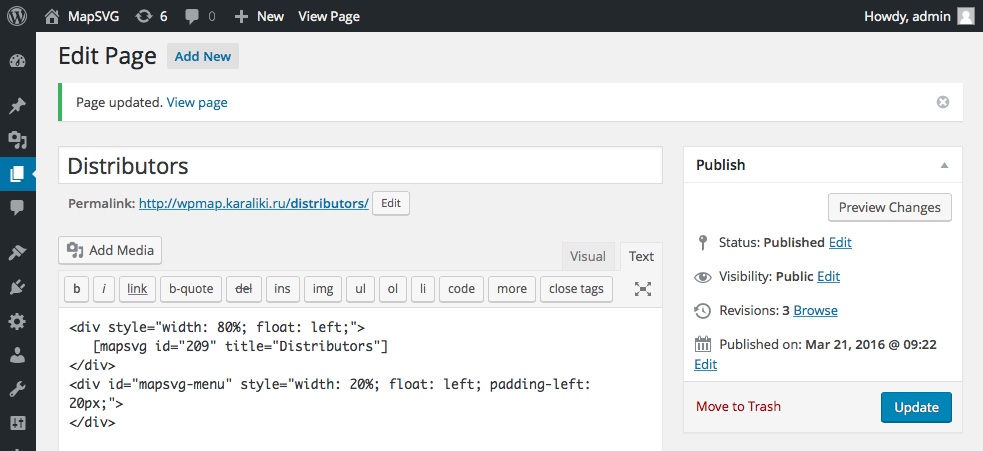
Save the map, go to WordPress Admin Menu > Pages, add new page. Insert your map into the page by clicking on button in Visual Editor toolbar.
We're almost done but we need to add a container for the menu. Remember we defined ID of menu container as "mapsvg-menu"? Let's add it now. Switch to "Text" mode in Visual Editor and put this HTML code into the input field:
<div style="width: 80%; float: left;">
    [mapsvg id="YOUR_MAP_ID"]
</div>
<div id="mapsvg-menu" style="width: 18%; float: right;">
</div>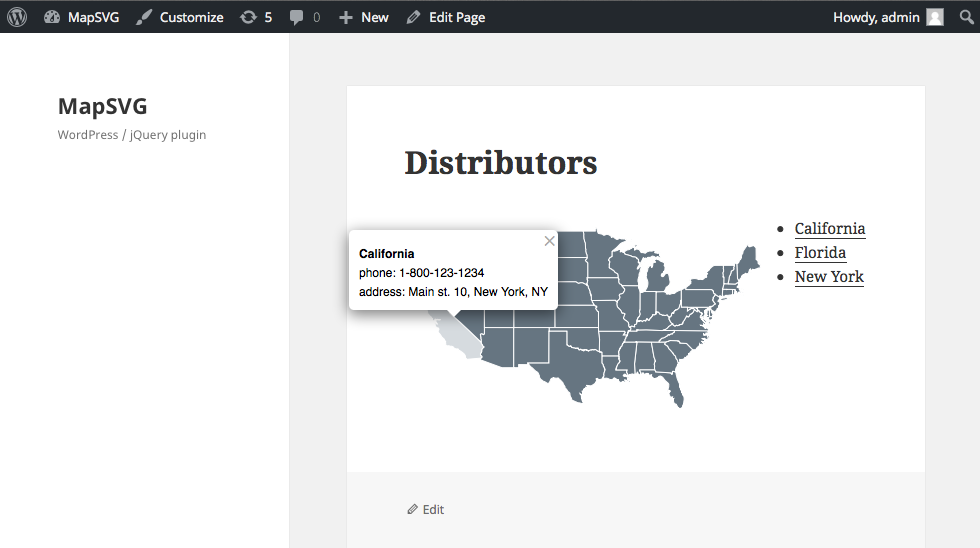
Save the page and see what we have!
MapSVG adds menu as <ul></ul> list into a given container.
It has CSS styling of your current WordPress theme - so it's up to you to style it as you
need to match it with your needs.