MapSVG 3.x tutorial
4. Adding markers
In the following tutorial we will learn how to add markers in MapSVG 3.
Prior to MapSVG 3 markers were independent objects. In MapSVG 3 the concept of markers was changed and now you should think of them as a representation of your Database Objects on a map.
What that means is that markers can not exists without some kind of Database Object which should be shown on the map.
It could be company office, real estate property, shop, etc.
Let's see how it works on the example of this tutorial. We will show office location on the map of USA.
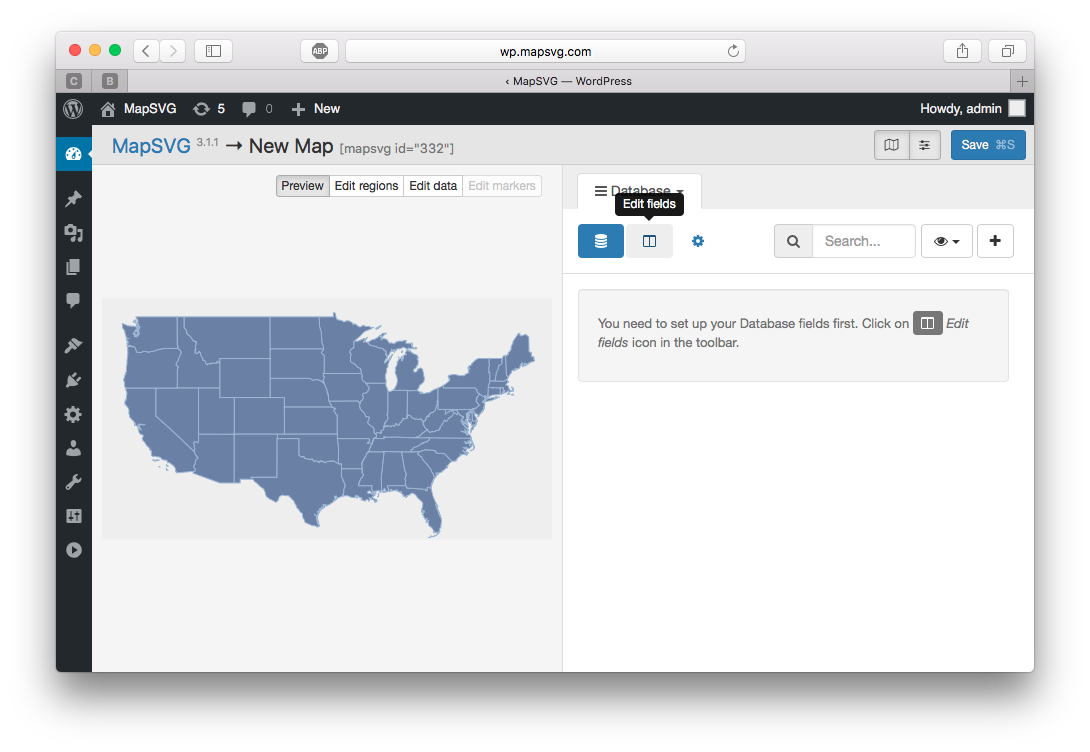
Switch to Database tab and click on Edit fields button in the toolbar.
Let's add the next fields:
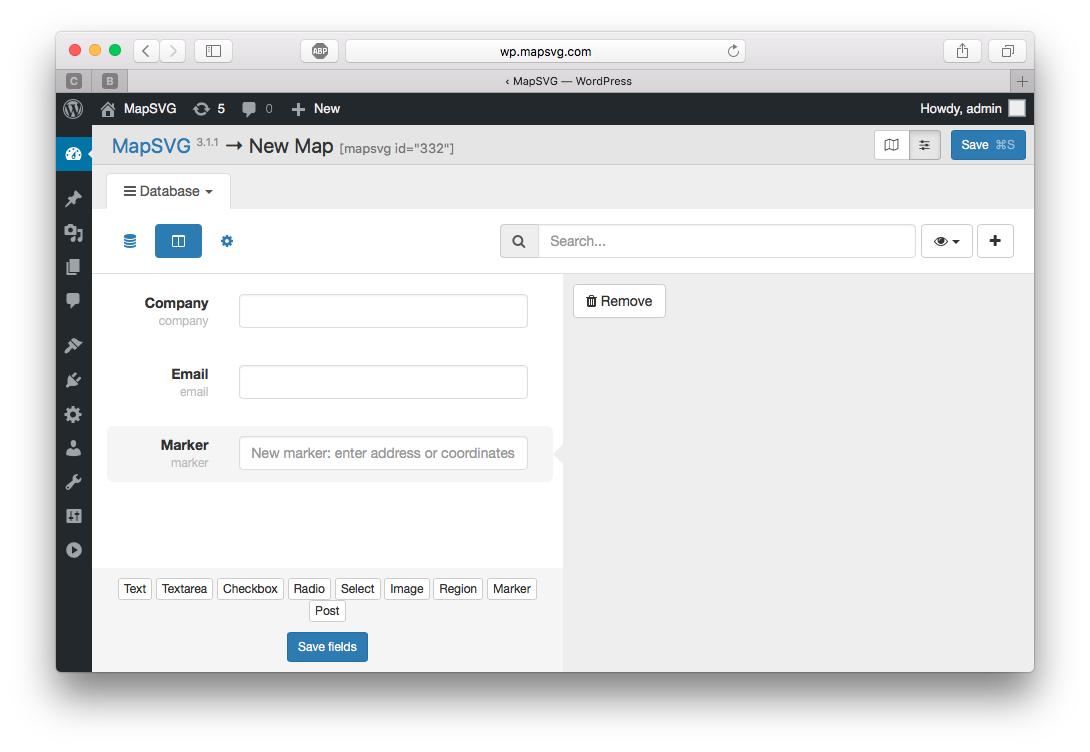
Textto store company name. Give it a name "Company"Textto store a email of a company. Give it a name "Email"Markerto store a marker
After you have added all 3 fields, click Save fields button and switch back to the list of database objects
by clicking on List button in the toolbar.
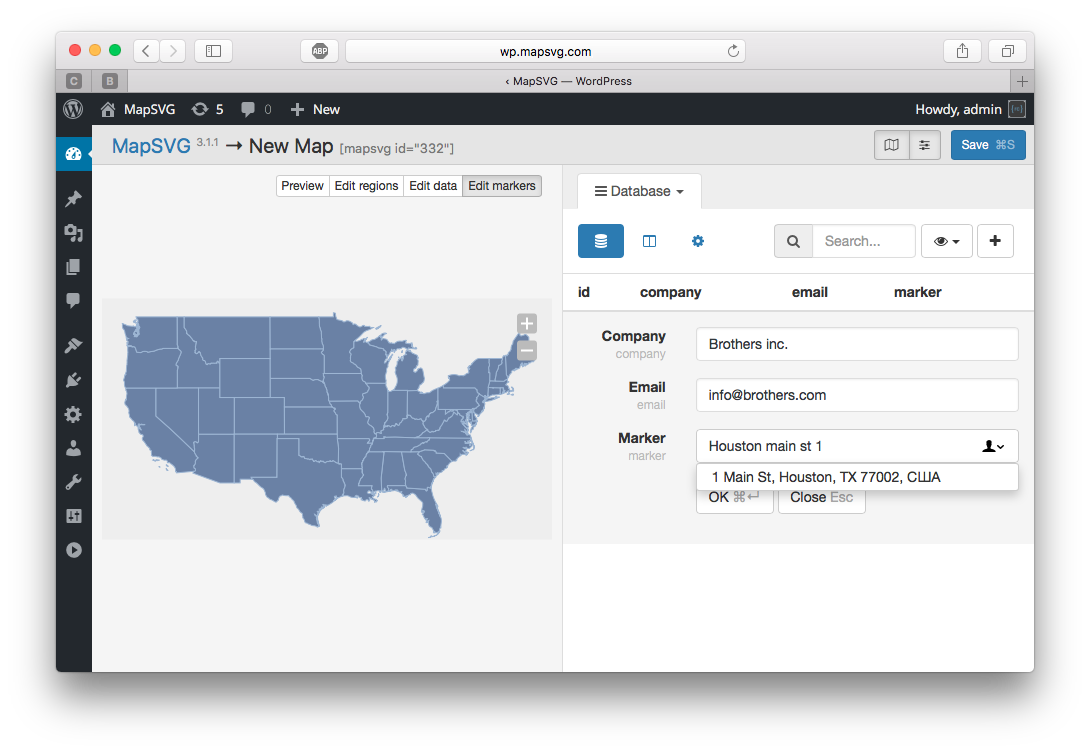
Click on Add button in the toolbar and
fill in the fields. Enter company name and email. While you're filling the form,
note that Edit markers button on top of the map became active.
You can click on the map to add a marker by the mouse pointer but if your map
is geo-calibrated you can enter any address into the input fields of Marker field and
then choose the address from drop-down autosuggestion list. After you choose the address,
marker is added to the map. Click OK button to save the record.

Now you can change image of the marker or click on the marker to move it to another position (lat/lon coordinates update automatically). Also you can delete the marker or enter new address to change marker position.

Now let's show company details in popover on click on the marker.
Switch to Actions tab. Select Marker click > Show popover.
Note what is said there: "Parent Database object will be passed into Popover template".
We'll see what that means on the next step.
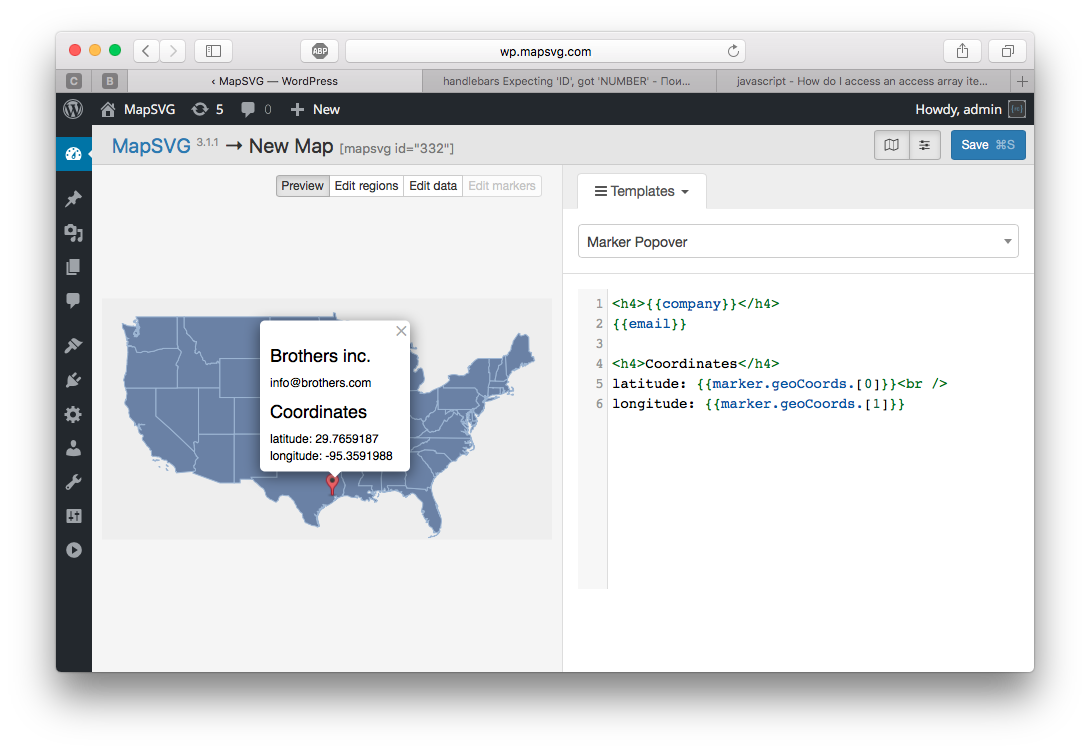
Switch to Tempaltes tab. Choose Marker popover template from drop-down list.
Add the following template code:
<h4>{{company}}</h4>
{{email}}
As you can see we can directly access all properties of our database object in
Marker popover template.