MapSVG 3.2.x tutorial
2. Templates, popovers, images
When you need to show information about a Region or Database Object on a map -
you have to set up a Template.
Templates are pieces of Text/HTML code with extra tags which look like this: {{my_custom_field}}.
Those tags are Handlebars markup. You can find more information about Handlebars here: http://handlebarsjs.com
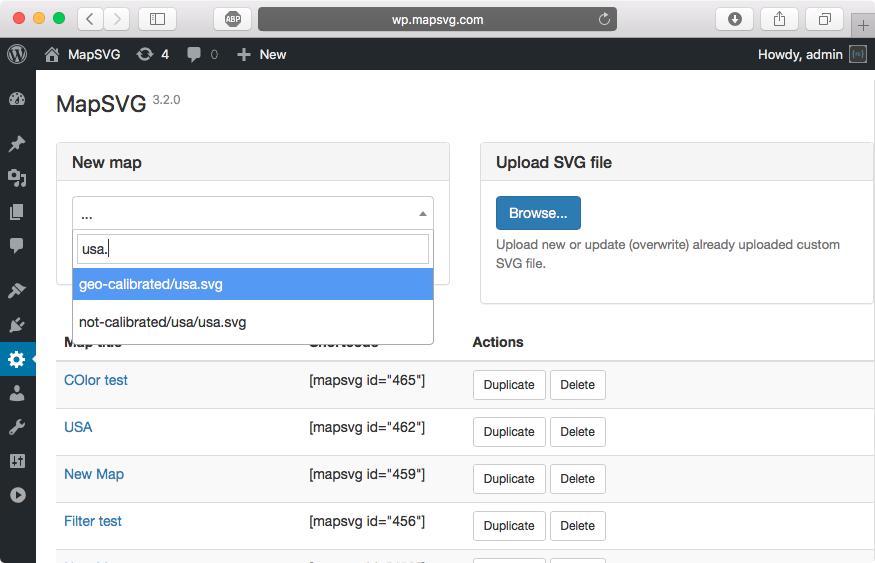
Let's start: click on Choose SVG file... and type in "usa.svg". You'll see suggestions with file names containing "usa.svg" string. Choose /geo-calibrated/usa.svg file.
When possible, always choose geo-calibrated maps over non-calibrated.
Geo-calibrated maps are newer, have Region titles and you can add Markers by geo-coordinates (latitude/longitude) or
just by entering an address which is being converted into coordinates automaticlly.
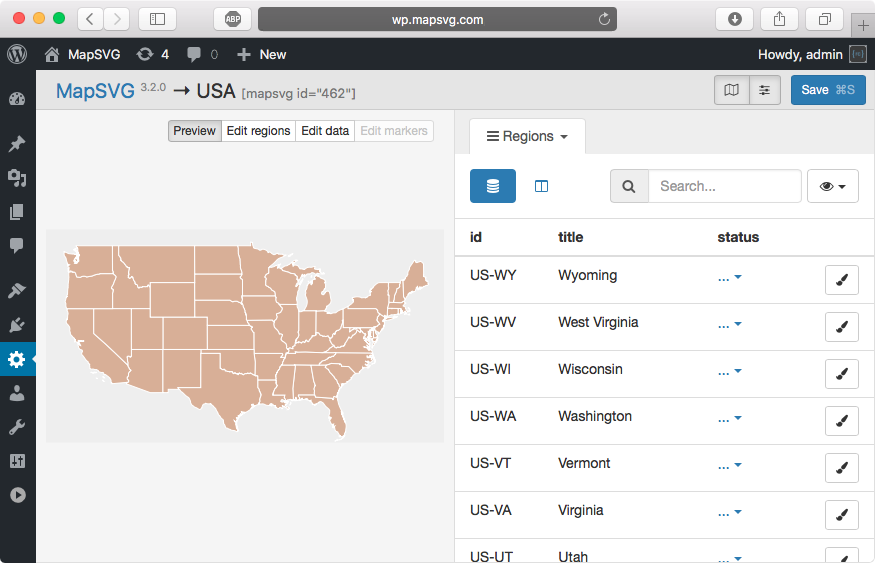
Switch to Menu > Regions. This settings section contains a list all active (clickable) objects
from SVG file. These objects are called "Regions" in MapSVG - which are US
states in our case with USA map.
If you use any of the included geo-calibrated maps, each Region already has 3 fields: id,
title and status.
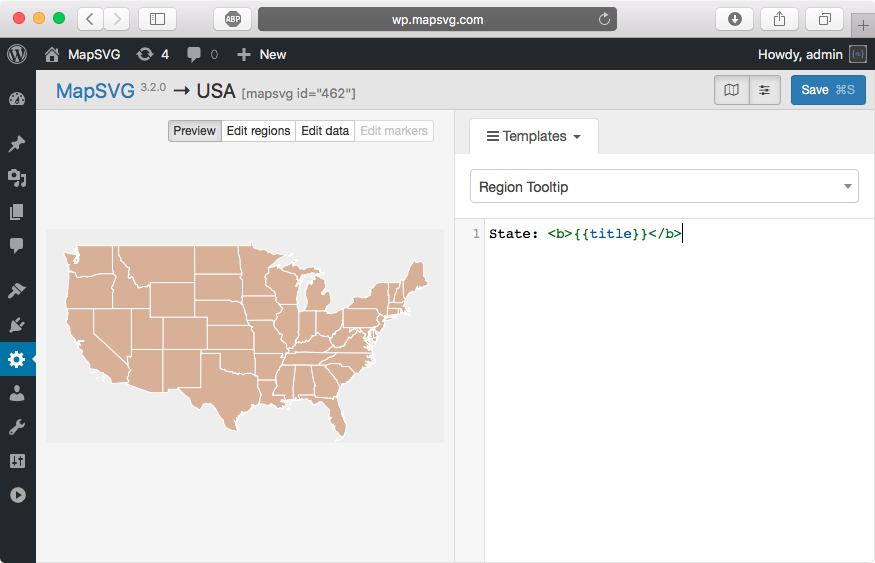
Let's create a template. We will show a state name in a tooltip on mouse hover. Go to Menu > Templates
and choose Region tooltip template.
Enter the code below into the template field:
State: <b>{{title}}</b>
The template code is regular HTML code with Handlebars tags.
You can find more info about Handlebars here - http://handlebarsjs.com.
When you hover the mouse pointer over a Region, MapSVG passes that Region
into Region tooltip template - and you can use any default or custom fields of a Region
in the template - with the help of Handlebars tags.
So if you want to show a title, just add a tag which looks
like this:
{{title}}
If you want to show a custom field with the name my_field, do it the same way:
{{my_field}}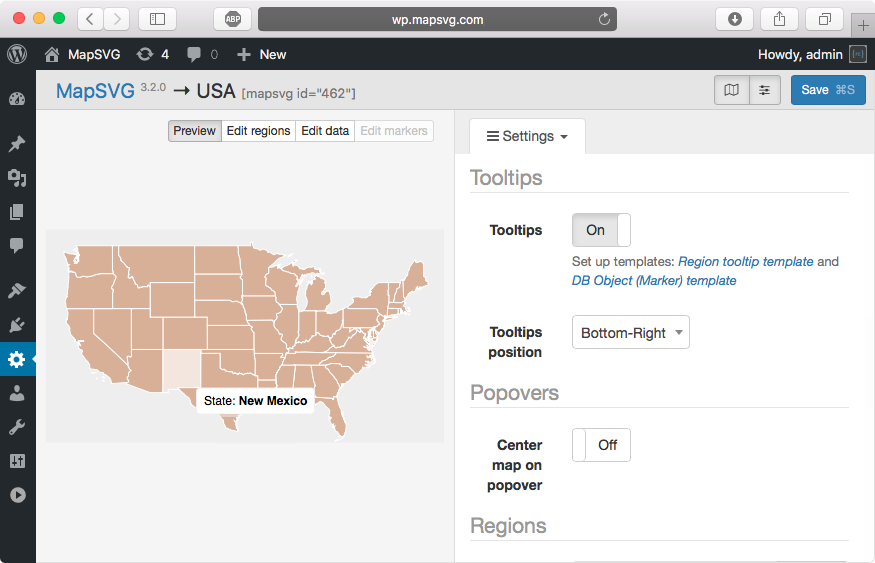
Now that we have our template ready, we need to go to Menu > Settings and turn on tooltips:
Tooltips: ON.
Make sure that map is switched to Preview mode (buttons on top of the map) and then try to hover
the mouse pointer on any of the states. You should see a tooltip.
Handlebars markup also allows to use logical conditions in templates:
{{#if something}}...{{/if}}and
{{#unless something}}...{{/unless}}Also we can go through a set of objects (for example if Region or Database Object have multiple attached images):
{{#each images}}
  {{thumbnail}}
{{/each}}
Another example, if a Region has multiple attached Database Objects:
{{#each objects}}
  {{field_name_one}}
  {{field_name_two}}
{{/each}}
And the same thing in another direction: if a Database Object has multiple attached Regions:
{{#each regions}}
  {{title}}
  {{region_custom_field_name}}
{{/each}}
No go to Menu > Regions. Click on Edit fields button in the toolbar.
Add Checkbox type field and name it "Visited". Add Image type field and name it "Images".
Click Save fields button and then click on List button
in the toolbar to return to the list of states.
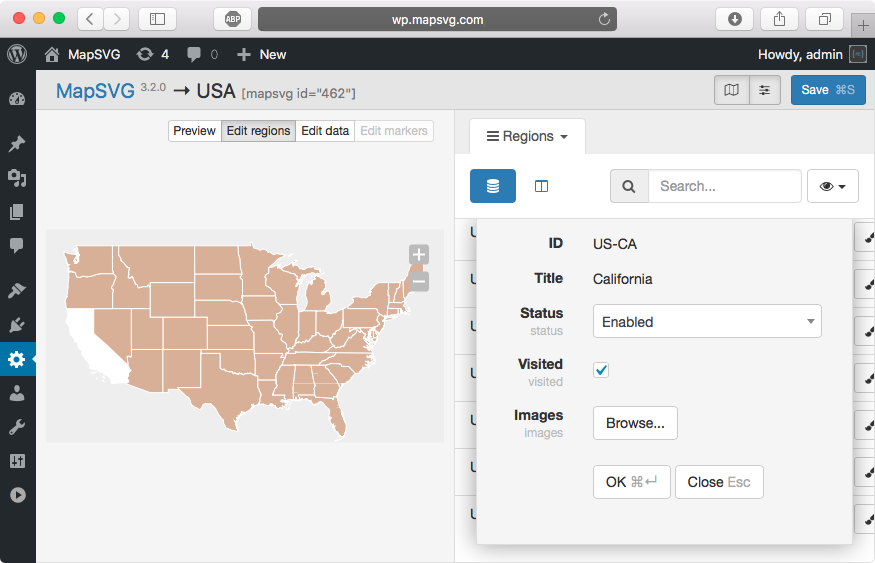
Switch the map to Edit regions mode (buttons above the map)
and then click on any state, for example California. Editing form appears on the right.
Check "Visited" checkbox. Repeat for a few more states.
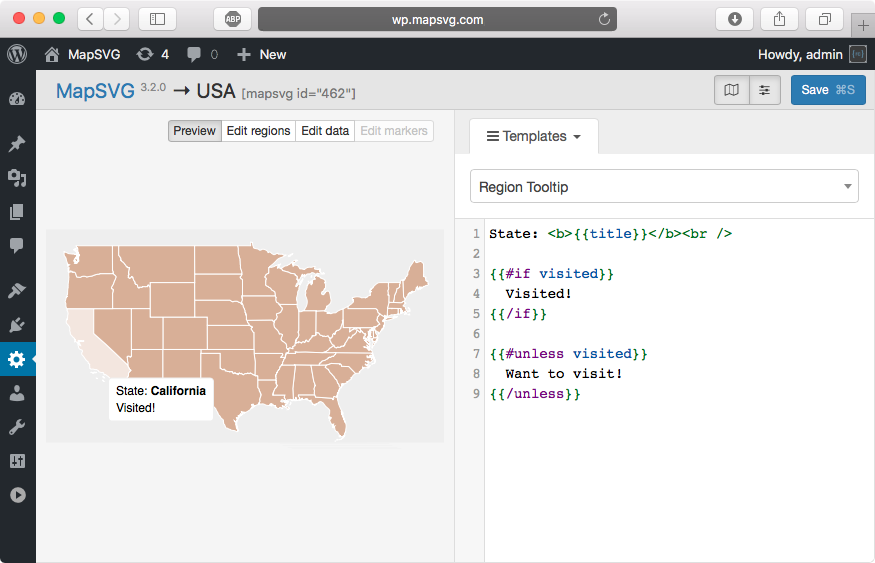
Switch to Menu > Templates > Region tooltip again. Change the template code to this:
State: <b>{{title}}</b><br />

{{#if visited}}
  Visited!
{{/if}}

{{#unless visited}}
  Want to visit!
{{/unless}}
Switch the map to Preview mode and hover the mouse pointer over states which you checked as visited
and then on others - to see the difference in tooltips.

Now go to Menu > Regions. Click on California state and then in appeared form on the right -
click Browse... button in Images field. Attach multiple images to the state
(hold down Shift key while you choose images).
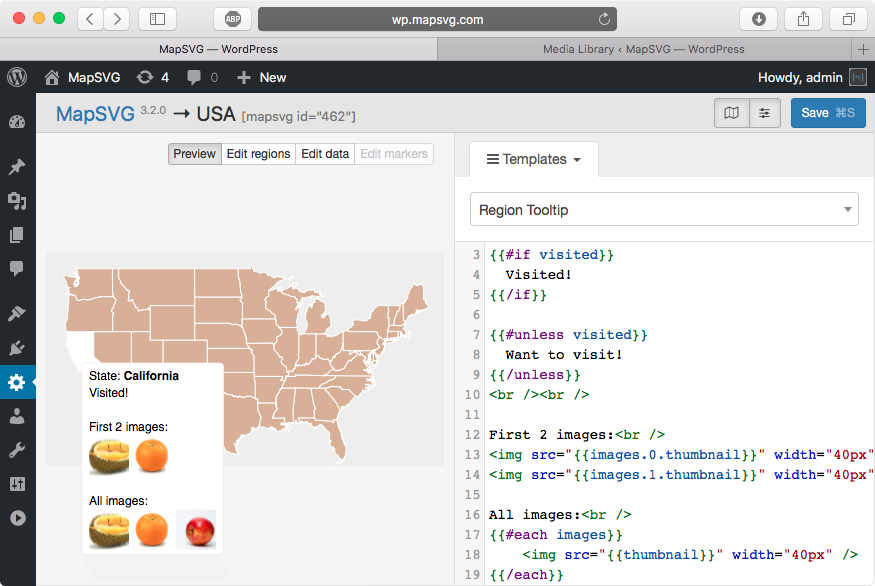
Go back to Menu > Templates > Region tooltip. Change the template code to this:
State: <b>{{title}}</b><br />

{{#if visited}}
  Visited!
{{/if}}

{{#unless visited}}
  Want to visit!
{{/unless}}
<br /><br />

First 2 images:<br />
<img src="{{images.0.thumbnail}}" width="40px" />
<img src="{{images.1.thumbnail}}" width="40px" /><br /><br />

All images:<br />
{{#each images}}
    <img src="{{thumbnail}}" width="40px" />
{{/each}}
Make sure the map is in Preview mode and hover the mouse pointer over the state
which has multiple attached images - to see the tooltip.
Now we're ready for the next tutorial: 3. Regions as links